SSH auth vs password based auth
SSH authentication is generally preferred over password-based authentication for several reasons:
Security: Passwords are easily guessed or hacked, whereas SSH authentication relies on cryptographic keys, which are much more difficult to crack.
Convenience: Once you’ve configured SSH authentication, logging in to a remote system becomes much easier. You don’t need to remember or type in a password every time you log in; instead, you just need to have your SSH key handy.
OpenSSH for Windows
Both OpenSSH for Windows and Git Bash offer SSH functionality on Windows. Both include tools to help support key management and authentication, namely:
- ssh-keygen for generating secure keys
- ssh-agent and ssh-add for securely storing private keys
- scp and sftp to securely copy public key files during initial use of a server.
But we will use OpenSSH for Windows in this case.
Why not use Gitbash for Windows ?
I prefer OpenSSH for Windows over Gitbash due to the following reasons:
- In GitBash, you have to start the SSH agent and add the private key(s) each time your system restarts. Whereas in OpenSSH for Windows, the keys that you add are persistent even after a system restart.
You may achieve the same in GitBash by modifying the .bashrc file. However this means increase in the time taken to start the GitBash terminal.
Check whether the OpenSSH client is installed on your sysytem
You can either use CLI method (Powershell) or GUI method to check this.
Using powershell
In an elevated (run as administrator) powershell session, run:
Get-WindowsCapability -Online | Where-Object Name -like 'OpenSSH*'Using UI
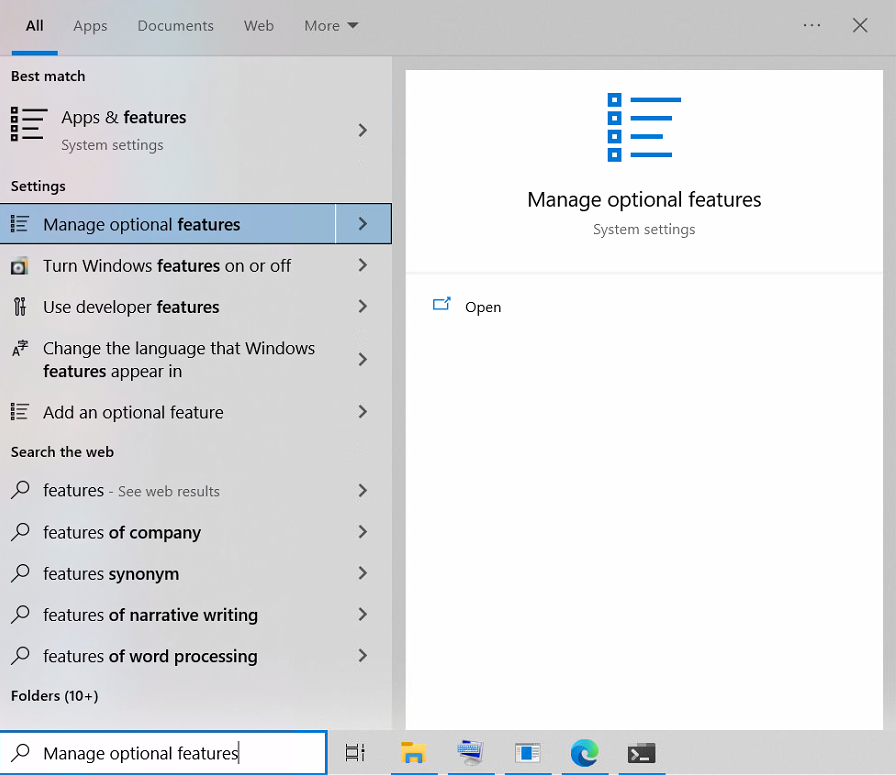
In the start menu search for ‘optional features’ and naviagte to the ‘Manage optional features’ system setting.

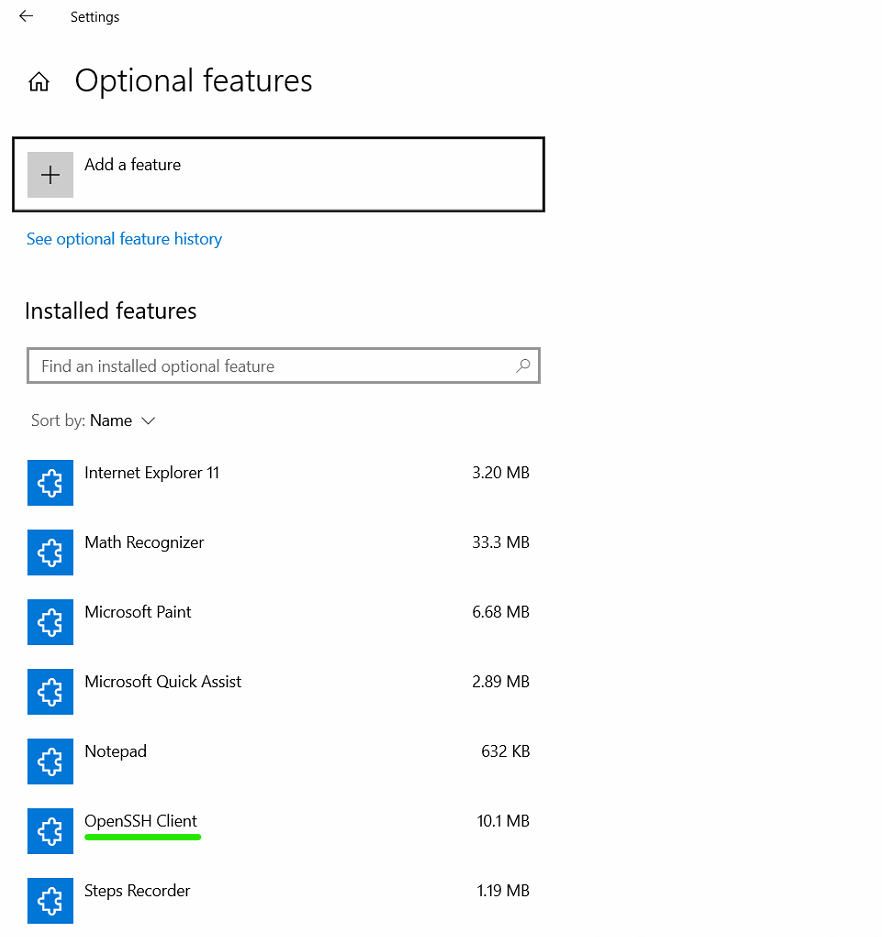
Check if openSSH client is listed under the installed features.

Install OpenSSH client if not present
# Install the OpenSSH Client
Add-WindowsCapability -Online -Name OpenSSH.Client~~~~0.0.1.0
If the installation was successful, you should see
Path          :
Online        : True
RestartNeeded : False
Key generation
You can generate a new SSH key pair, by using the following command.
ssh-keygen -t ed25519 -C "abc@mail.com"You should get a prompt like the following.
Generating public/private ed25519 key pair.
Enter file in which to save the key (C:\Users\Employee1/.ssh/id_ed25519):
Now, you have to enter the file name (with its location) for the private key. The public key will be stored in the same folder. The private key file doesn’t have any file extension, whereas the public key file has an .pub extension.
C:\Users\Employee1/.ssh/sid_githubIf you have added a valid path, you will now be prompted to enter a passphrase.
Enter passphrase (empty for no passphrase):
Enter same passphrase again:
Your identification has been saved in C:\Users\Employee1/.ssh/sid_github.
Your public key has been saved in C:\Users\Employee1/.ssh/sid_github.pub.
The key fingerprint is:
SHA256:IY7AZRAIwCoOjGIasdfgha3GOiuazirYsONJvr606cs abc@mail.com
The key's randomart image is:
+--[ED25519 256]--+
|Oo=+++           |
|++ +o .          |
|+.o. ... .        |
|Co .+o . .       |
|D. o. . S        |
|o.o              |
|.* o             |
|%.*              |
|%E+              |
+----[SHA256]-----+
Now you have a public/private ed25519 key pair in the location specified. The .pub files are public keys, and files without an extension are private keys.
Add private key to ssh agent
By default, the ssh-agent service is disabled. We should start it as well as configure it to start automatically whenever the system starts.
To start the ssh-agent service each time your computer is rebooted, enter the following command in an elevated PowerShell session:
Get-Service ssh-agent | Set-Service -StartupType AutomaticNow you can start the ssh-agent service by running the following command.
Start-Service ssh-agentAdditionally. you may verify the same by checking the running status of ssh-agent. You can use the Get-Service cmdlet to perform this.
Get-Service ssh-agentIf everything is alright, you should see an output similar to the following.
Status   Name               DisplayName
------   ----               -----------
Running  ssh-agent          OpenSSH Authentication Agent
Add private key to ssh-agent
ssh-add $env:USERPROFILE\.ssh\id_ed25519It is recommended that you store your private key in a secure location and then delete it from the local system. The private key cannot be retrieved from the agent since a strong algorithm has been used, such as Ed25519 in this example. If you lose access to the private key, you will have to create a new key pair and update the public key on all systems you interact with.
Verify whether key was added successfully
You can run the following command to see a list of all private keys added to the ssh-agent.
ssh-add -lIf the key addition was successful, you should see an output of the following format.
256 SHA256:<key> <email> (ED25519)Add public key to GitHub
You can copy the contents of the public key (say sid_github.pub) by using the following command:
Get-Content -Raw $env:USERPROFILE\.ssh\sid_github.pub | clipThen, you can navigate to https://github.com/settings/ssh/new, in order to add a new public key to GitHub.

Check connection to GitHub
As a final step, it’s time to check whether you are able to authenticate with GitHub servers using SSH credentials. You can use the following command to do so:
ssh -T git@github.comIf you have multiple SSH keys to authenticate with different GitHub accounts, then you can specify the private key that you want to use.
For example, if you want to test authenticating with GitHub using the sid_github private key, you can use the following command to do so. Basically, we specify the private key to be used for authentication using the -i option.
ssh -T git@github.com -i $env:USERPROFILE\.ssh\sid_githubYou should see an output similar to the following if you are doing this for the first time on your system.
The authenticity of host 'github.com (IP ADDRESS)' can't be established.
RSA key fingerprint is SHA256:+DiY3wvvV6TuJJhbpZisF/zLDA0zPMSvHdkr4UvCOqU.
Are you sure you want to continue connecting (yes/no)?
You can check if the hash shown above matches the one provided by GitHub here: [https://docs.github.com/en/authentication/keeping-your-account-and-data-secure/githubs-ssh-key-fingerprints].
If they match, then the connection is indeed safe and you can enter ‘yes’ to proceed further.
Finally you should see the following, if the authentication was successful.
Hi USERNAME! You've successfully authenticated, but GitHub does not
provide shell access.